
 Organization is key when tying flies. There are a lot of materials, hooks, beads, and spools everywhere. Keeping track of them all is a challenge. The first homemade fix is to build a fly-tying bench. These can be made large or small to meet your needs. Having a consistent place to tie is essential.
Here are some do it yourself ideas to make your fly tying better and faster.
FLY TYING BENCH Time is money when tying flies. Having just what you need, for the fly you are tying, is vital. Clear the deck of everything except what you need for that one specific fly. All your tying gear should be organized in some type of shelf unit. My tying box is made from oak and has a deck that folds down. This unique box is sturdy and mobile. It can be set up on the truck tailgate or in a drift boat. My vise is attached to a wooden base. A drawer system is inserted into the largest open box. When I fish a special place, I stock my tying box with materials, hooks, and tools that I can expect to use.
MAGNET LAUNCHING PAD Hooks can easily get tangles or lost when tying. Use a magnetic advertisement pad to hold the hooks in place. The kind that you get from the vet or some home repair guy. They are usually 3×4 inches in size. Glue them to your tying deck. When you tie, get out a dozen hooks and line them up. If you are tying bead heads, load the bead onto the hooks and place them onto the magnetic launching pad.
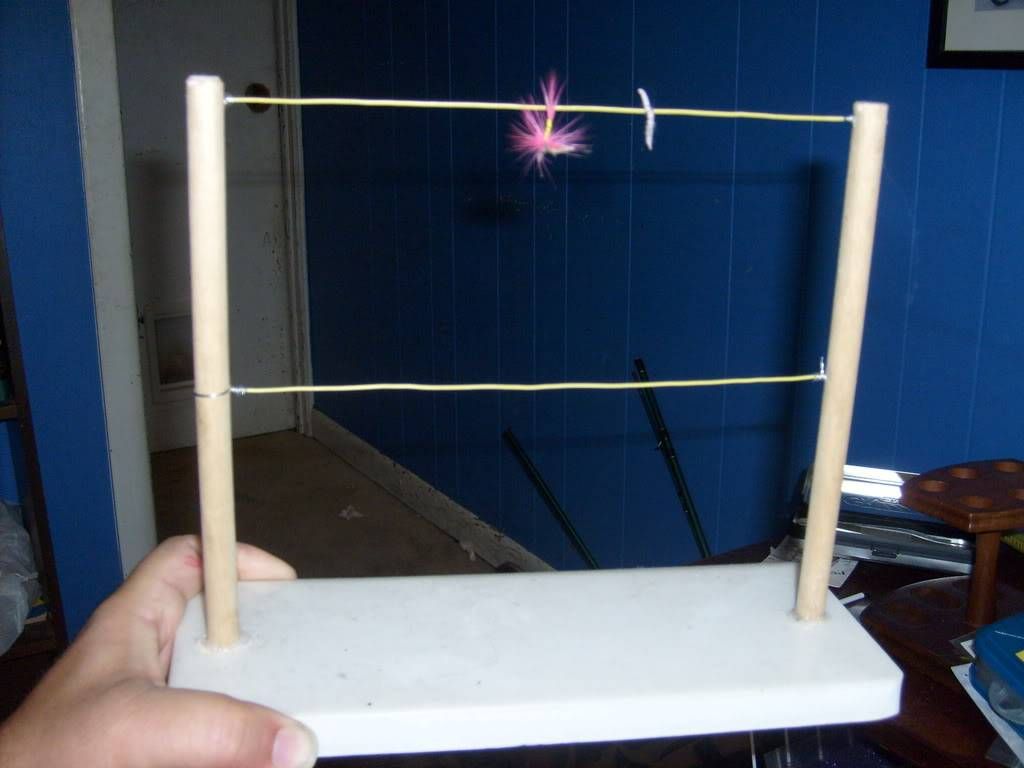
FLY DRYING RACK Make your own rack to hang flies. This helps to get an even drying of lacquer after adding head cement. Larger streamers, poxy flies, and jigs are easily hung for drying. Gravity can be your friend when making consistent painted or coated heads. I also use the rack when making bucktails, crankbaits, or adding hair to spinners.
PROBES and NEEDLES Its easy to make a needle. Use a piece of wire and drill a hole into a wooden dial or handle. Grind a sharp point at one end. This is a perfect tool for clearing hook eyes, adjusting body materials, straightening wings or whatever. Glue a cork/wine bottle cork, to the fly-tying deck, to stab the needle in place until you need it.
DUBBING HOOK Make yourself a simple dubbing hook the same way you would make a needle. Instead of having a sharp point, make a bend at the end of the wire. This hook can be hooked onto a thread loop when you begin adding dubbing to the suspended threads. Once the dubbing is in place, simply spin the dubbing loop to make a consistent length of body material. Now you can wrap the spun body onto the hook, using your loop.
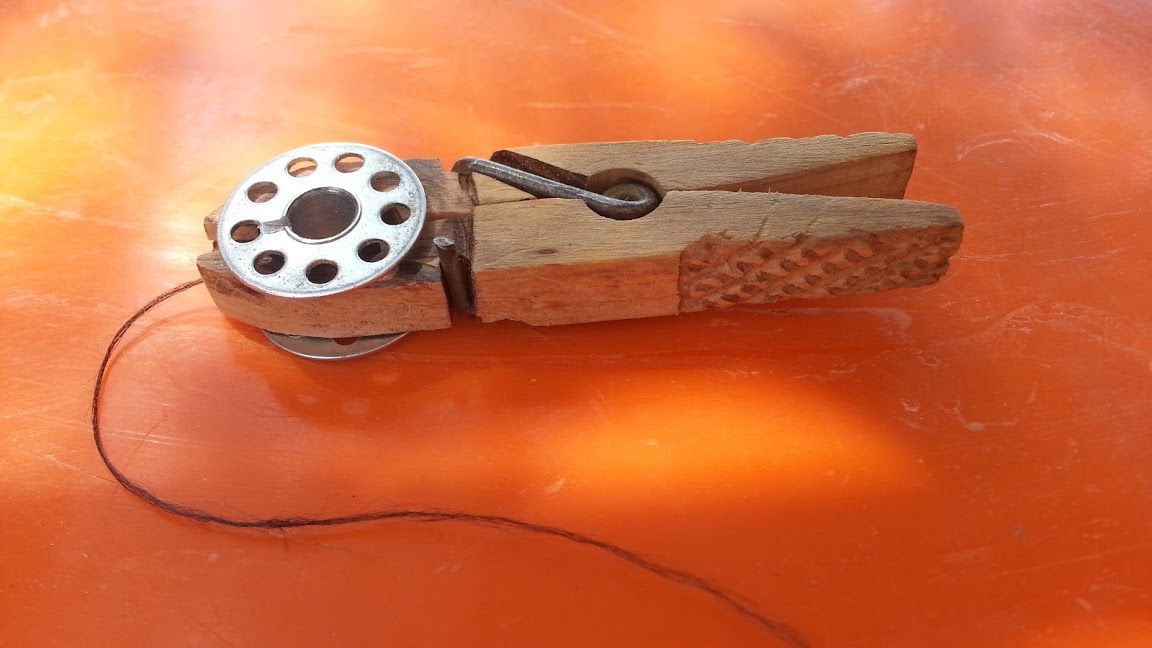
CLOTHES PIN BOBBIN Controlling tying thread makes a cleaner and stronger fly. If you don’t have a modern spring bobbin, try using a clothes pin that holds a small threaded wheel in place. If you need more tension from the jaws of the bobbin, add a tightened rubber band. On one occasion, I used a mouse trap as a bobbin. Just cut one side off the metal spring trap. The trap spring will add plenty of tension. It’s a bit bulky but will do the trick.

Don’t forget to improvise. When you are in the back country and need to tie a fly or make a rod/guide repair, there are ways to make quick fixes and save the day. Most anglers have a pair of vice grips in their gear box. This works as a perfect tying vice and will secure the hook or jigs in a pinch. A pair of clamping forceps will do the same. On a trip to Canada, I once used some alligator clips to hold my walleye jigs as I made repairs.
Be organized and creative!
Montana Grant